


31 Jul Breaking Down Kernmantle Rope
 The tones go off at 10:30pm, jolting you awake. “PRFD, respond to County Park for a report of a hiker who has fallen down an embankment. Hiker is a 35 year old male, conscious and breathing, and complaining of a leg injury. Reporting party states patient is stuck part-way down the slope. B-boy response” You think to yourself that 30 minutes of sleep will have to get you through, as you step into your boots and rush out to your truck. Arriving on scene, you realize that this is going to be a long call; the heavy rain from earlier in the day has turned the slope into a sloppy mudslide. A member of your crew reaches into the compartment and grabs the first rope he lays a hand on; the new purchase (on sale) from the local hardware store.
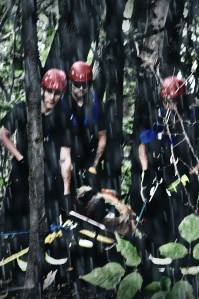
Realizing that you’ll have to bring the patient back up the slope, your crew starts to set assemble a lowering system. You set yourself a line and move into position as an edge attendant. Using your headlamp, you’re able to locate your patient. The patient, John, says he lost his way as the sun went down and got turned around. He slipped in the mud at the top of the hill and was lucky to be able to stop himself where he did, before he ended up sliding into the river below. He says he’s sure he’s broken his leg. You assure him that your team is ready to come to him, and explain what is happening.
It was a slippery mess trying to get your litter team of 3 down to the patient, but they’ve finally reached him. They managed to get him onto the backboard and are securing him as your haul team is preparing to raise. The haul team radios that they’re ready to raise, and the litter team confirms they’re ready as well. You give the command to begin to raise
slowly. It’s a slow process; for every two steps the team makes, they seem to slide back one, and the rope is slick with mud. Through the darkness it’s hard to see exactly what the litter team is doing, but they’re having trouble maneuvering around some brush. You turn towards the haul team, about to tell them to slow it down even further, when you hear a gasp from down the slope as one of your team members loses their footing on the unstable surface.
A sudden jolt, and the rope falls slack…

It is the job of every team member to understand the capabilities and uses of their gear. While we acknowledge that “MacGyvering” can have its place, choosing the correct equipment for the job will go a long way in increasing the efficiency and safety of your rescue work. This is especially critical when it comes to key pieces of equipment such as the ropes used in your systems. As departments are required to handle a vastly growing range of disciplines, budgets are tighter than ever. It can be tempting to go with the “lowest bidder”, in order to maximize the amount of gear you can afford. Be careful of this trap. Do your research and know your options. Invest in gear which will stand up to the test of battle. Doing so will not only increase the safety of your team and your patient, but will also give you peace of mind, knowing that your team has the equipment they need to do the job.
There are so many options for rope out there, it can become a bit overwhelming. It easily can look all the same. But with rope, it really is what’s inside that matters the most. Here we’ll break down the most commonly used type of rope, and hopefully help you to choose with confidence.
NON-RESCUE ROPES
In order to understand what should be used, we need to know what shouldn’t. The best rope for rescue is “kernmantle”, but it’s not the only type of rope out there.
Types of non-rescue rope:
-Twisted or Laid: general utility or marine use
-Double-Braid: utility or accessory
-8-Strand: heavy marine use
The most commonly used ropes in rope rescue situations are “KERNMANTLE” which has two main types; “Static” and “Dynamic”
“Kern” is German for “core”. The Kern is the inner core of the rope. This is where the rope gets its strength (upwards of 80%). It’s made up of a number of fibers, depending on the thickness. These fibers can be straight or they can be twisted into a number of little bundles inside. The amount of twist in these inner bundles will affect how much the rope can stretch.
The twisted kern is “dynamic“. This is what we use for recreational climbing rope, because this rope will stretch and help with fall protection. The amount of twist will affect the stretch of the rope, which in turn absorbs the shock of a fall while climbing. When the rope is shock-loaded, these twisted fibers will untwist a bit, lengthening the rope enough to ease the jolt of your fall. Dynamic kernmantle rope is a great choice for most rock climbing applications. Often this kern will be made of nylon. Some fibers twist clockwise and some counterclockwise.
The straight-fibered kern is “static“. This is what we use in rescue ropes because it does not stretch the way the dynamic does. When hauling a patient up a slope or creating a high line, we do not want to have to pull all that extra stretch out of the rope before we even start to move the load. Add into that a mechanical advantage, and we’re really dealing with a lot of elongation and greatly reducing our team’s efficiency. More than just being a nuisance, this excess elongation can be dangerous for the rescuers, especially in a high angle situation with an edge transition. The trade-off is that these static kernmantle ropes do not withstand the shock of a fall as effectively, for that very same reason. Often this static kern will be made of polyester. Polyester is the favored material because it does not stretch as much as the nylon does. Additionally, the polyester fibers are more resistant to UV damage and chemical damage.
“Mantel” is German for “coat”. The mantle is the outer layer of the rope. Though it may provide some strength, the main strength of the rope lies within its core. The chief purpose of the mantle is to protect the inner fibers (kern). It’s a thin layer of tightly woven material, often an abrasion resistant polyester. A very tightly woven mantle will increase abrasion protection, but will also be less flexible and harder to tie knots.
http://www.nfpa.org/codes-and-
… As you arrive on the scene of the embankment, you realize that you’ll need to bring the patient back up to the top of the slope. A member of your crew reaches into the compartment and grabs the 300′ kernmantle rope-rescue rope in the red rope bag. You feel confident in this rescue, knowing that your community and department has outfitted your crew with the gear it needs to get the job done safely, and that your team is trained. As your crew sets up the lowering system you set yourself a line and take your place as an edge attendant. You assure the patient that help is on the way and explain to him what’s happening.
It’s a bit of a slippery mess for your litter team of 3 to reach the patient, but they manage to reach him and secure him before he slides further down toward the river. Your haul team signals to you that they are ready to raise. The litter team assures you that they are also ready. You radio to begin raising, slowly. The litter team is having a hard time on the sloppy mud slope, slipping and sliding with each step. They are having trouble getting around some brush. You turn to tell the haul team to slow down even more, when you hear a gasp from down the slope as one of your team members loses their footing – the rope holds firm; it has been designed to endure these kinds of shock loads. You quickly call an “all stop”, allowing the litter team to regroup. Once they’re ready you begin to slowly raise again, helping your team as they round the edge of the embankment. The ambulance has arrived on scene during the raise and are ready to transfer your patient. Your team breaks down the system and returns to the station, muddy, but happy: a job well done.
Choosing the correct equipment for the job will go a long way for the safety and efficiency of your rescue operation. Know your gear and understand why your team uses what it does. And, as always,
PRO Instructor

Disclaimer: Legally speaking, we should tell you that the views expressed in this blog, as well as in comments, are those of the author and do not necessarily represent the views ofPioneer Rescue & Outfitters as a whole. Information is provided for informational purposes only. As with everything in life, it’s important to research and form your own opinions based on the facts you verify rather than simply taking the views of others as gospel truth. Pioneer Rescue & Outfitters cannot be held liable for the information presented. This blog is not a substitute for professional training courses. For that, you can visit our Contact page and schedule training with us! Thank you for your understanding.
Sorry, the comment form is closed at this time.